Step 3: How to Create an Insight Location
Click here to watch more SitePulse How-To videos on Youtube.
-
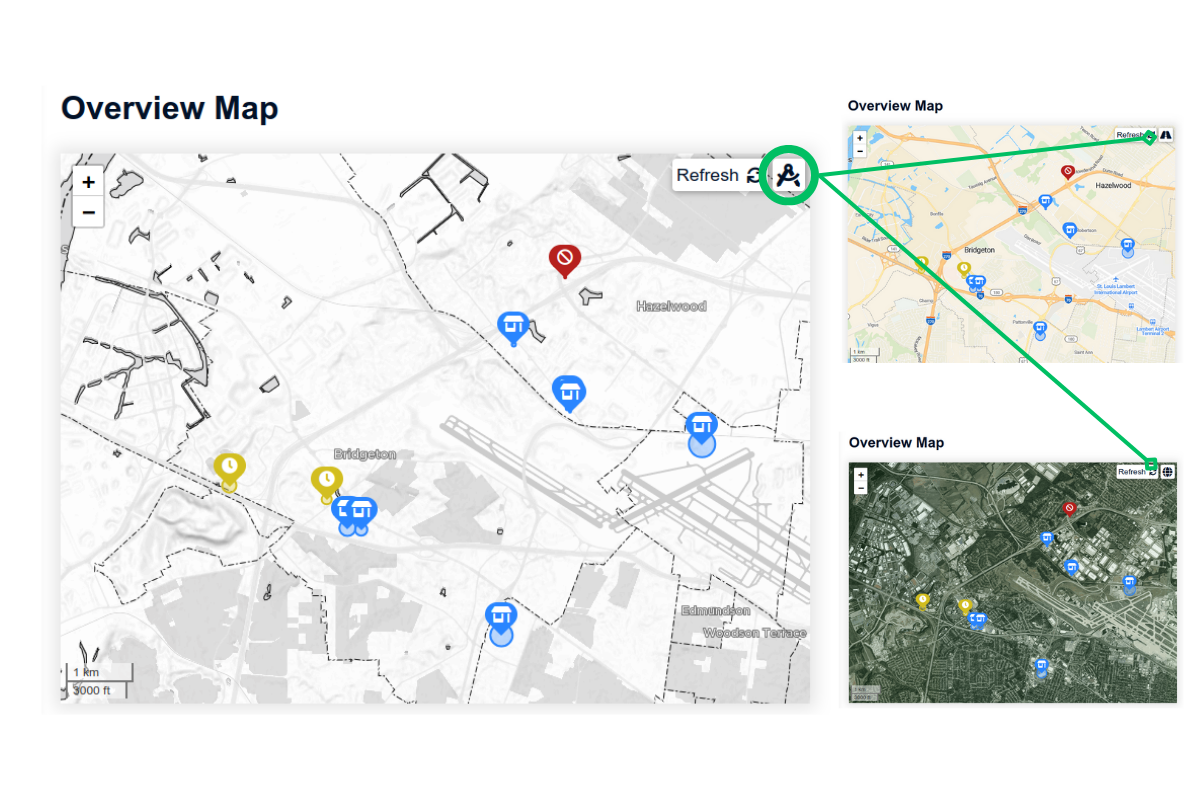
Navigate to the Overview Map. Use the icon in the upper-right corner to change the map’s color scheme, which can help you locate your site more easily.
-
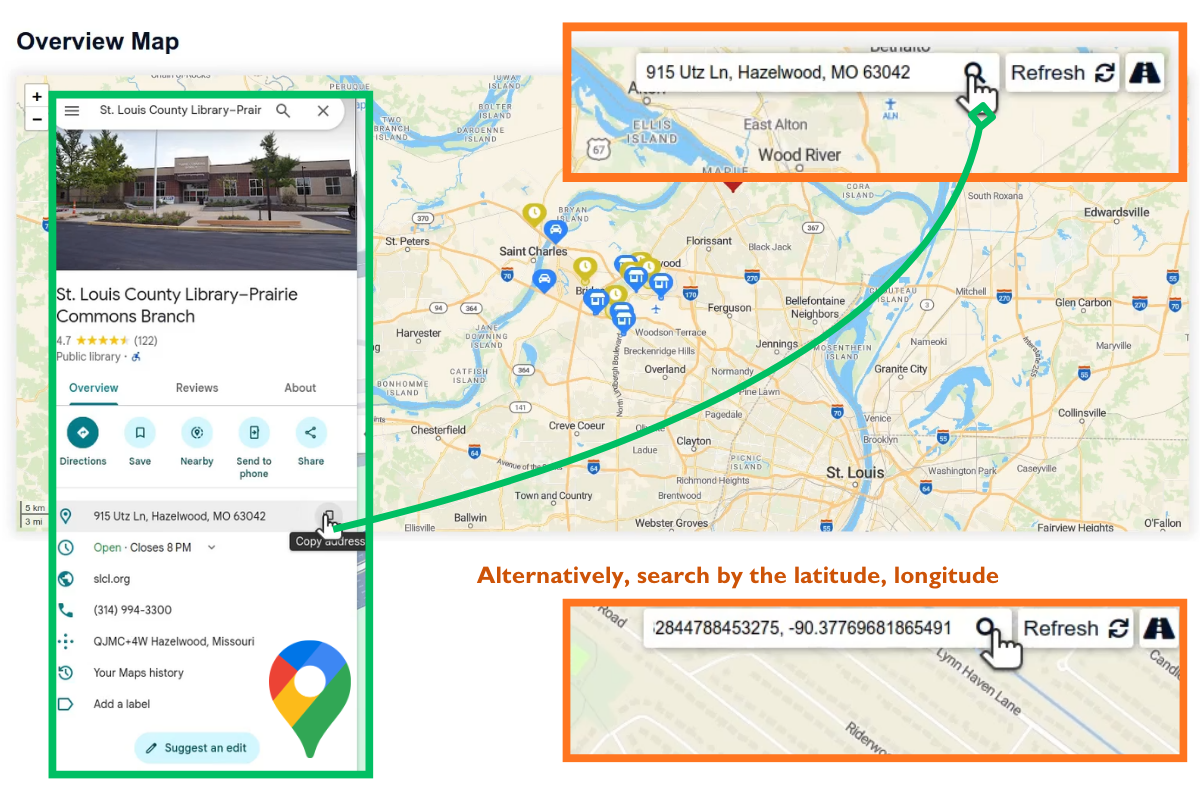
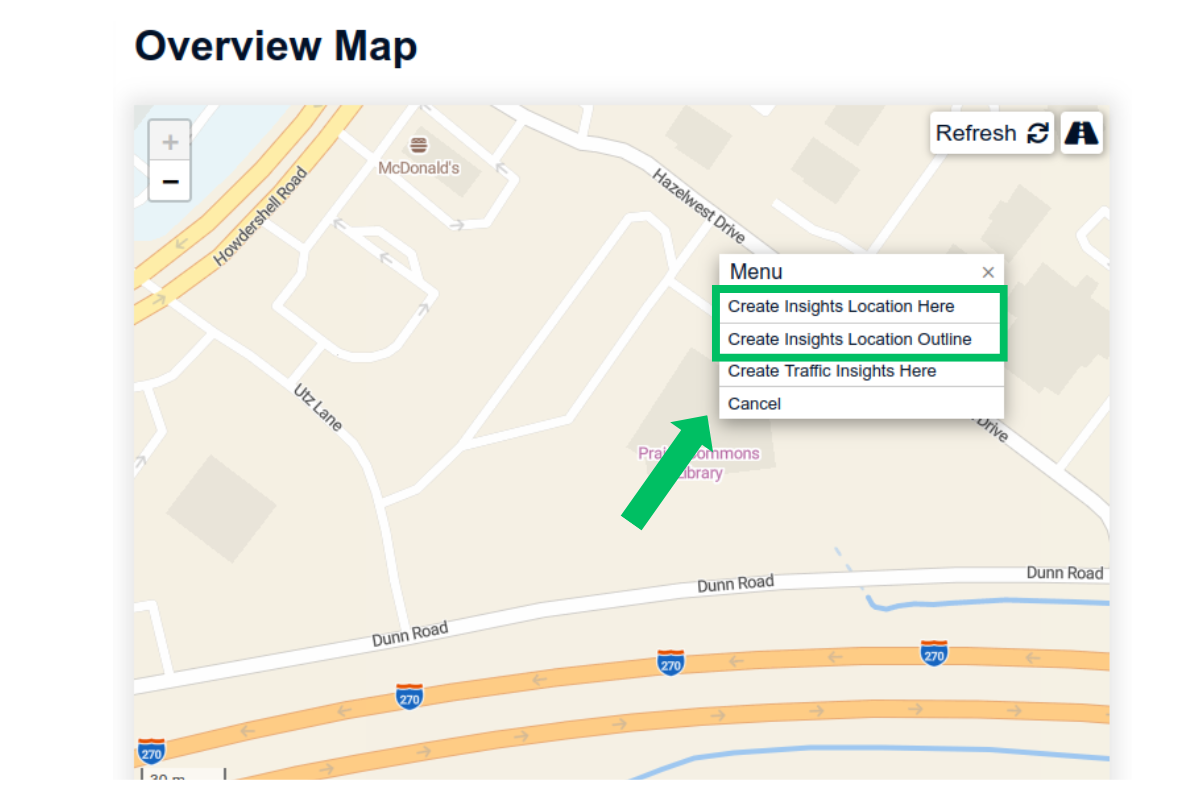
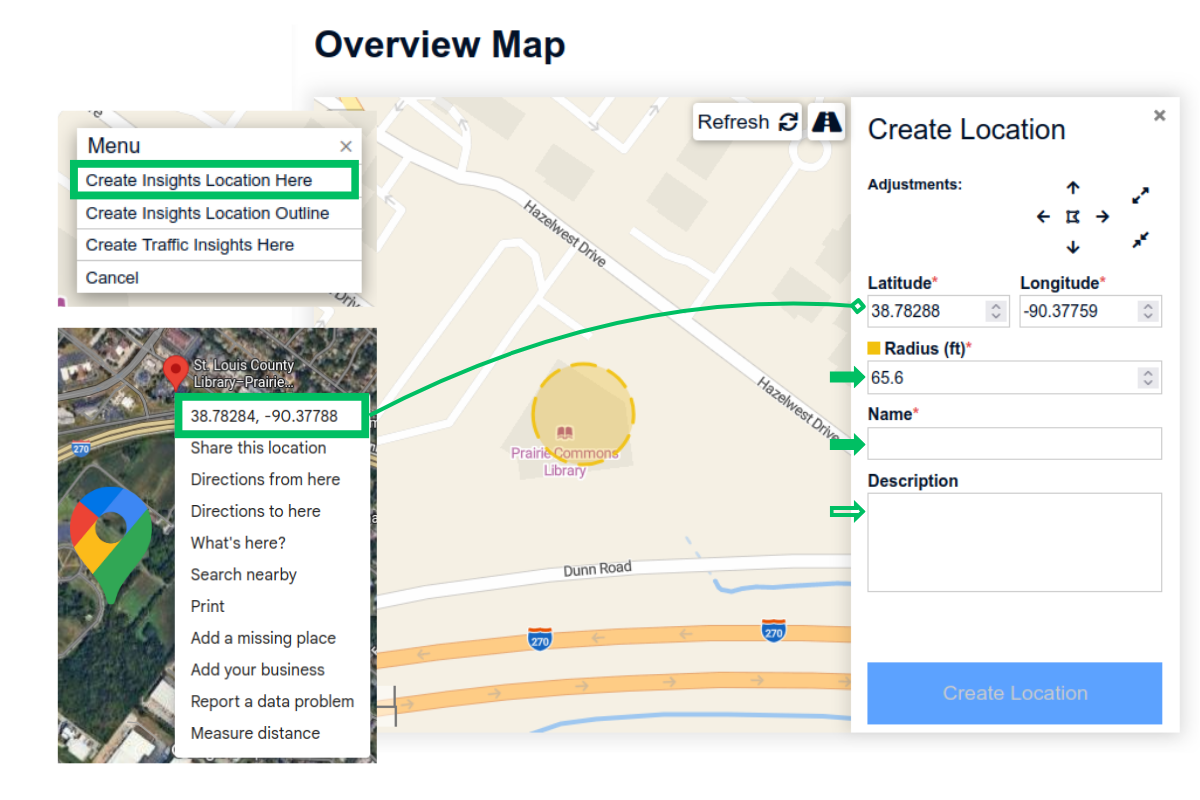
To create a new insight location, zoom into the location on the map and right click to bring up the “Menu”. Use the search bar on the top right corner and an external map software, such as Google Maps, to help you find the location.
-
There are 2 ways to create a new insight location, where you are interested in the visitor at this location:
- Create Insights Location Here: Draws a circle around your site. You can adjust the size and location of the circle.
- Create Insights Location Outline: Outline the area you wish to include. The program will automatically generate a circle that covers the polygon.
-
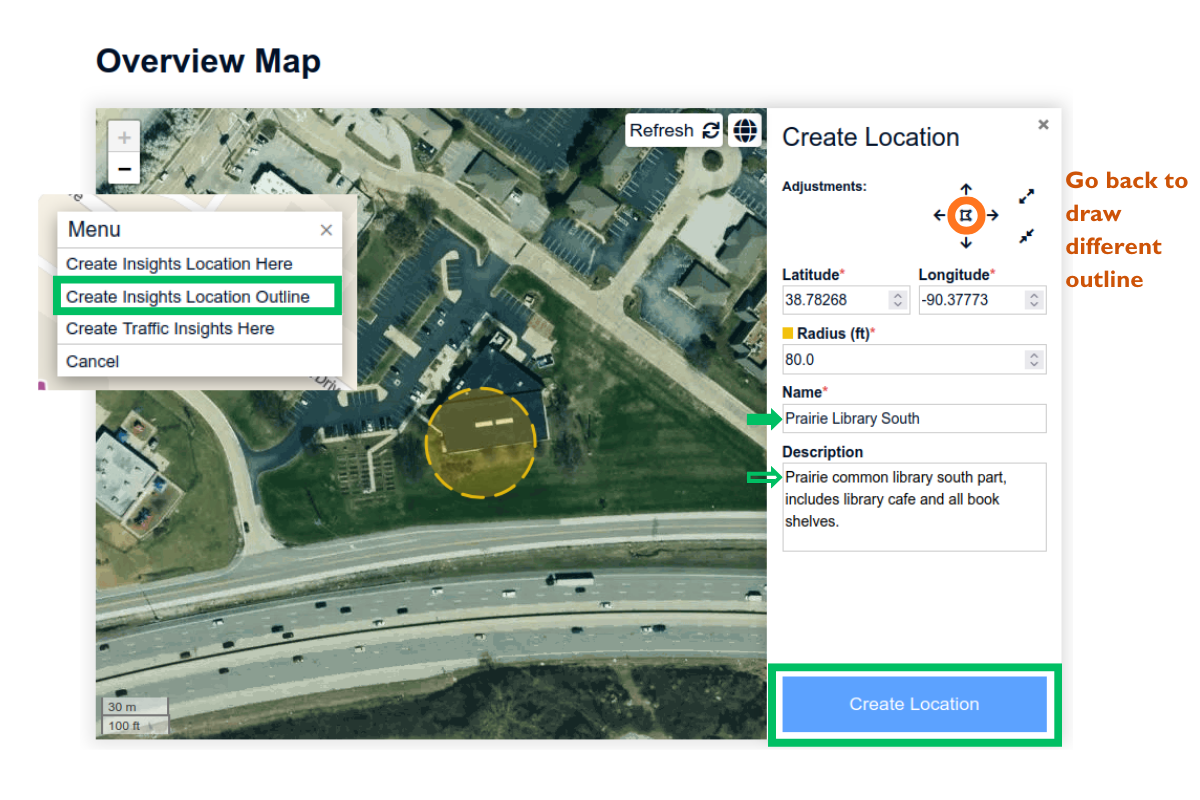
Click “Create Insights Location Here.” A yellow circle appears on the map, showing the selected area. To improve accuracy, use Google Maps to find the latitude and longitude, enter those values, and then zoom in on the map.
-
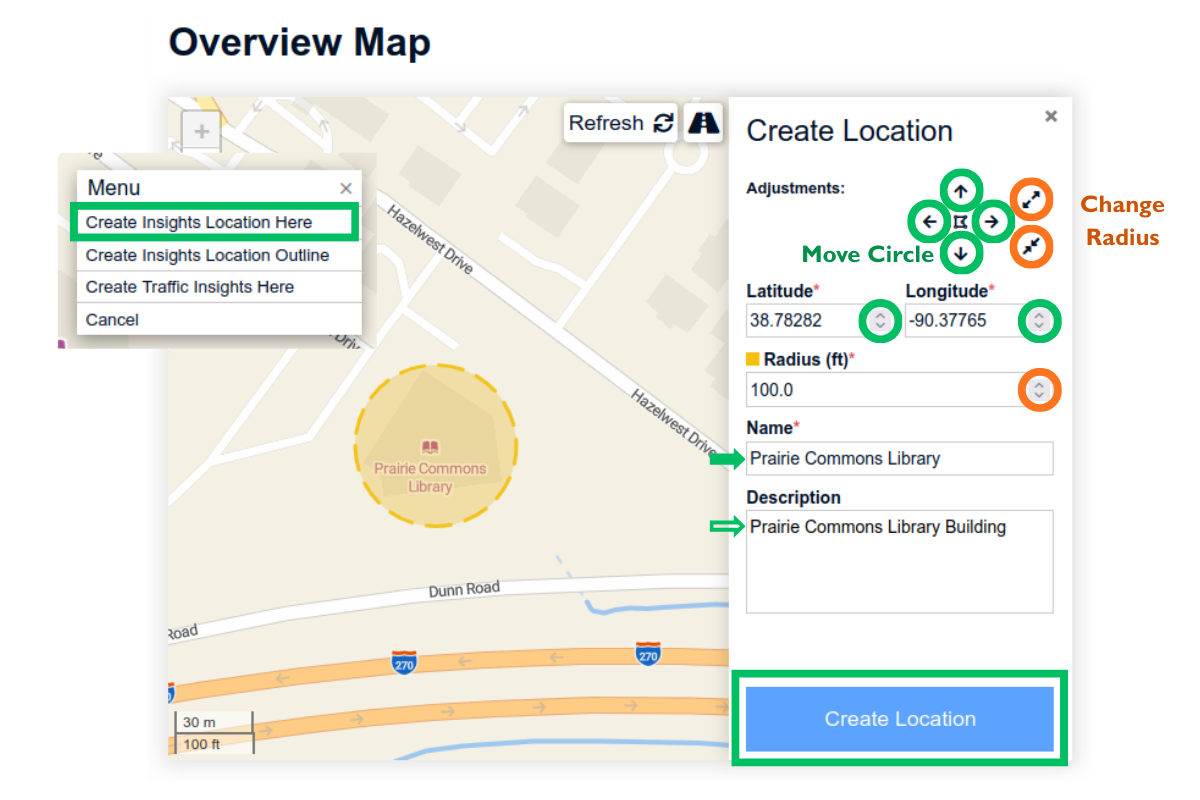
Use the adjustment arrows to move the circle and change its radius until it covers the desired site. Enter a name and description to keep your locations organized. Click “Create Location.” The location is added to the pending queue. Once approved by our support team (typically within a few days), data will become available for this site.
-
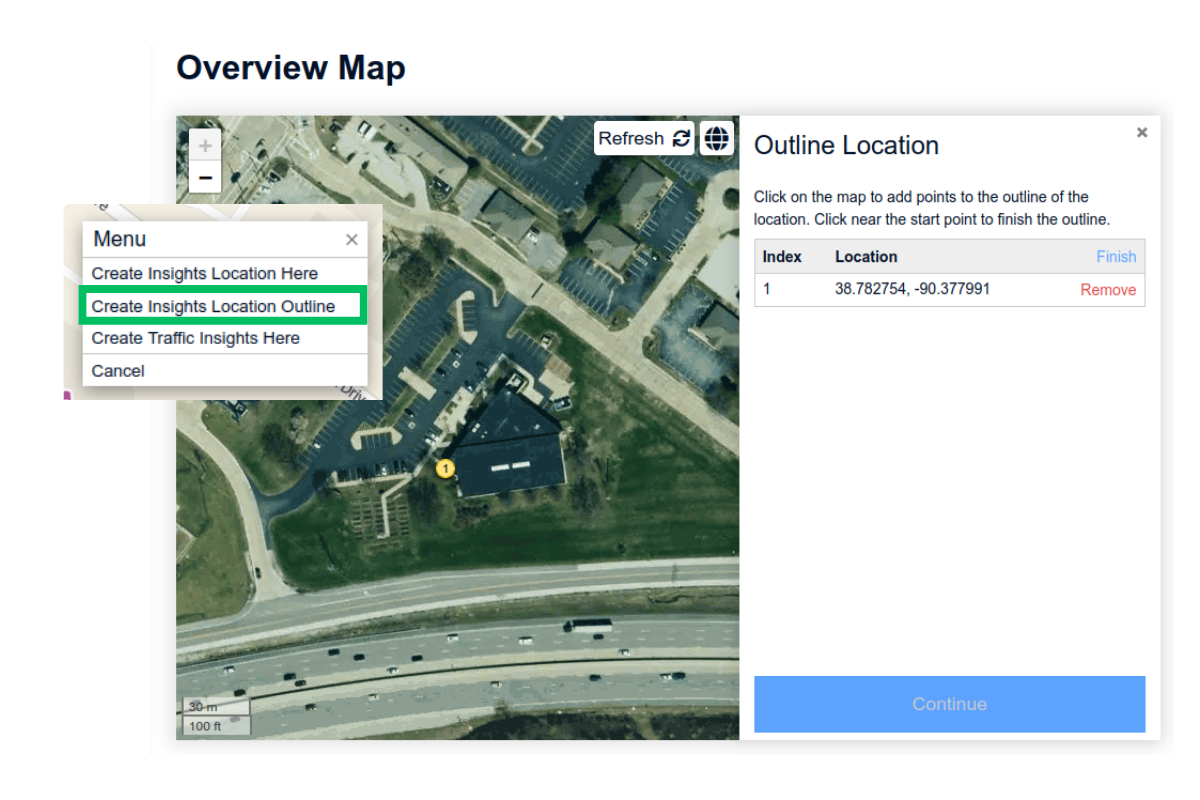
Alternatively, click “Create Insights Location Outline.” The point labeled “1” marks the starting point of the outline. If needed, you can remove it from the list view and start over.
-
Click along the perimeter of the area you want to include. Precision is not critical, as the system ultimately generates a circular boundary. You can remove misplaced points from the list view at any time. When finished, click “Finish.”

-
Confirm the outline by clicking the blue “Continue” button, or restart the selection by clicking “Restart” at the top of the list.

-
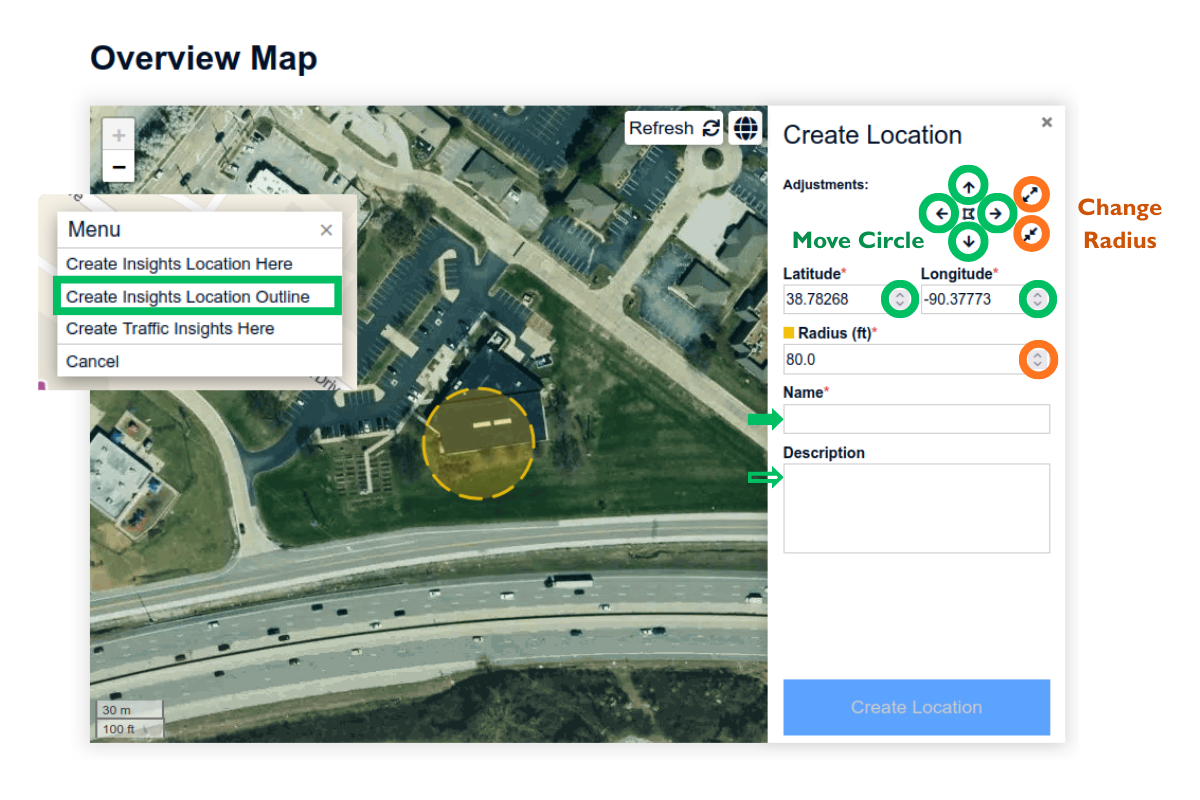
The system automatically generates a circle that encompasses the outlined area. Use the adjustment arrows to fine-tune the circle and its coverage.
-
Enter the name and description, then click “Create Location” to submit. You can return to the outline step by clicking the polygon icon in the center of the adjustment arrows. Once submitted, our support team will review the location and provide feedback within a few days.